High-quality Replacement Spa Cabinets to Rejuvenate Your Cal Spas. Easy-to-Use Ordering Guide.
Cabinet Panels are maintenance-free, and will keep their color for decades.
CHOOSING YOUR CABINET STYLE:
Over the years, spa cabinet panels may need to be replaced due to faded color or
stains from sun damage or normal wear and tear without the proper maintenance. If
your spa’s cabinet is damaged beyond normal repair. Cal Spas spa cabinets are constructed
to last by using the highest-grade synthetic material in the industry.
We understand that spa cabinets are an integral part of the look and overall construction
of the entire hot tub. With durable integrated framework, Cal Spas replacement spa
cabinets are strong enough to support even the largest hot tub designs.
Our highly-durable spa cabinet panels mimic the look of natural wood and available
in a variety of colors that complement any backyard landscape. Cal Spas Cabinet
Panels are completely maintenance-free, weather resistant and flame retardant. Best
of all, these panels will maintain their rich color for the years to come with the
UV light inhibitors that are integrated into the cabinet’s construction.
You can find hot tub Cabinet Panels for sale here.
FIND YOUR SPA MODEL:
Use the metal placard located on the front of your spa to find your spa’s unique
serial number and model. Use this information to order replacement spa cabinets
for the appropriate spa model.

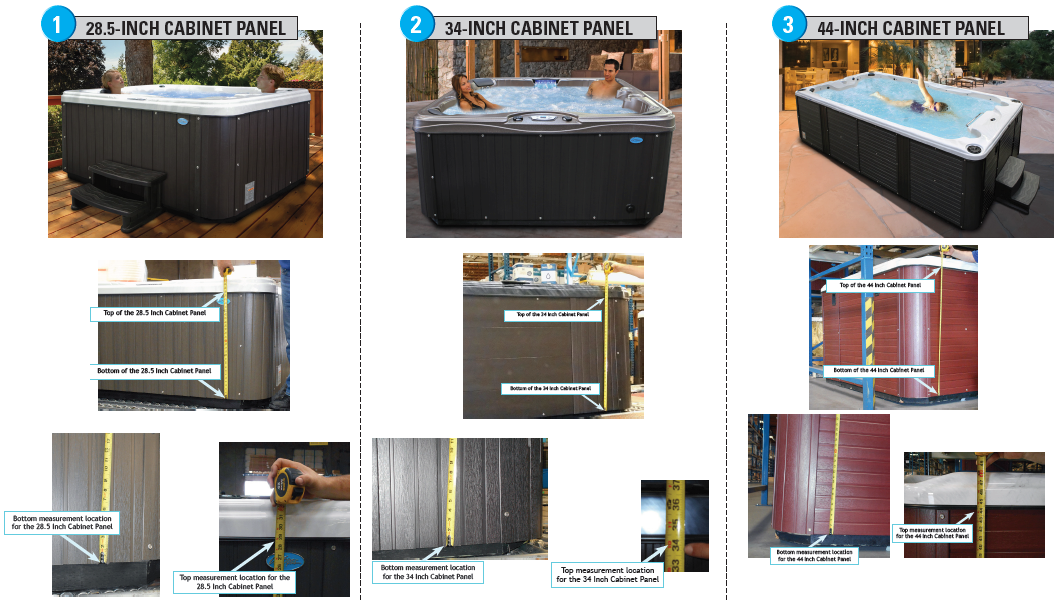
HOW TO MEASURE YOUR SPA CABINET PANEL:
This guide provides instructions to spa owners that need to measure their Cal Spas
cabinet spa panels for ordering replacements.
Measurements for all heights of Cal Spas Cabinet Panels start at the panel bottom
(not the absolute bottom of the spa) and end at the point where the panel meets
the acrylic mold piece that comprises the top portion of the spa.
THERE ARE THREE (3) DIFFERENT SPA CABINET PANEL HEIGHTS:
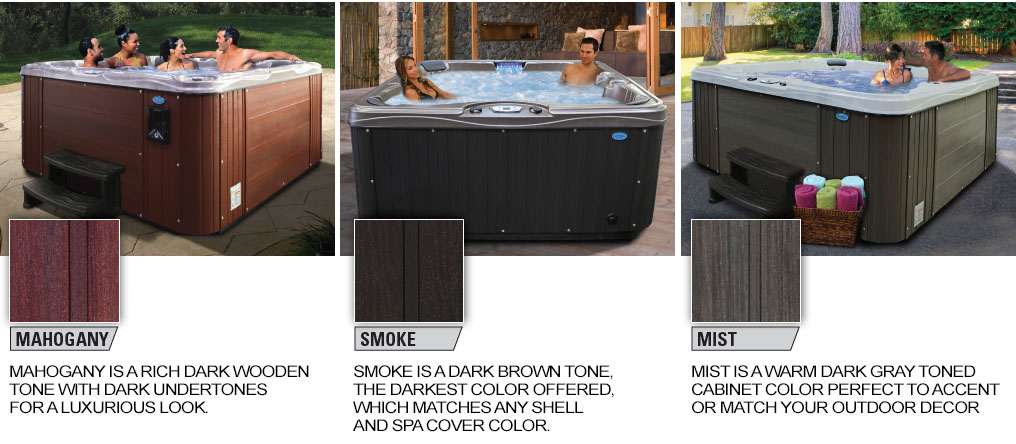
SPA CABINET PANEL COLOR CHOICES:
Cal Spas replacement cabinets are made of an eco-friendly weather resistant, maintenance-free
and easy to install synthetic material. Best of all, each cabinet emanates the look
of real wood with a natural wood grain to match your home’s outdoor living space.
Cal Spas Cabinet Colors Available:
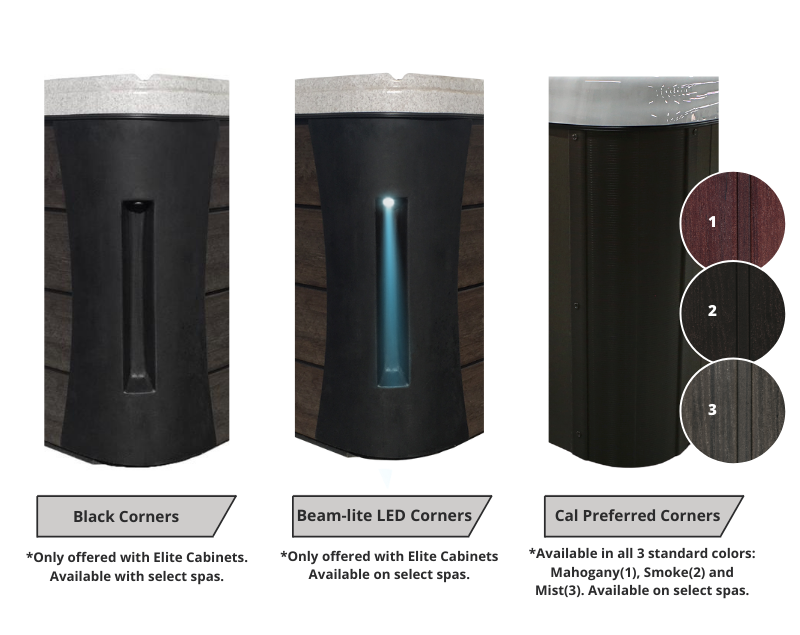
SPA CABINET PANEL CORNER CHOICES:
Replacement spa cabinet corners are available in various colors and styles to further
personalize your spa.
Choose between different spa corner styles with your choice of color, textured
black corners (available on Platinum and Platinum Plus Spas), and Corner Cabinet
lighting.
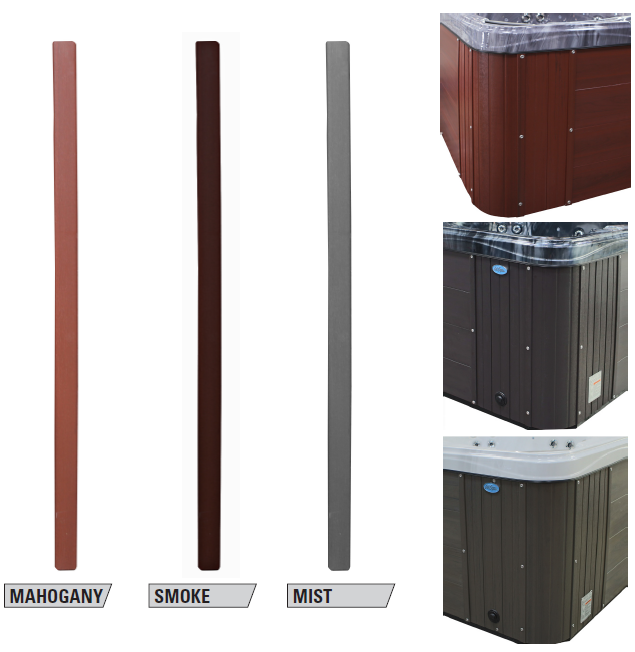
SPA CABINET T MOLDING:
T Molding is the edging used in between slats of spa panels to provide a seamless
and sleek finish to any spa cabinet. Made of the same material as the panels, the
T Moldings are available in Mahogany, Smoke and Mist to match your spa’s cabinet
color perfectly.
What is the Difference Between Pressure Treated Wood Frame and Metal Frame?:
To ensure you receive the correct cabinet panels when ordering, please check the
internal structure of your Cal Spas. Certain models have a wooden frame,
while others have a metal framing. Though the type frame won’t interfere with the
size of your cabinet, it is imperative to order accordingly to ensure you receive
the correct backing on the cabinet panels.
NOTE: Metal Framing was introduced in 2015 as an available option. All Platinum
Spas and Platinum Plus Spas are built using a metal framing. If your spa was manufactured
before 2015 you’ll need to order cabinet panels with wooden backing material. Please
verify your spa unit’s frame before ordering.

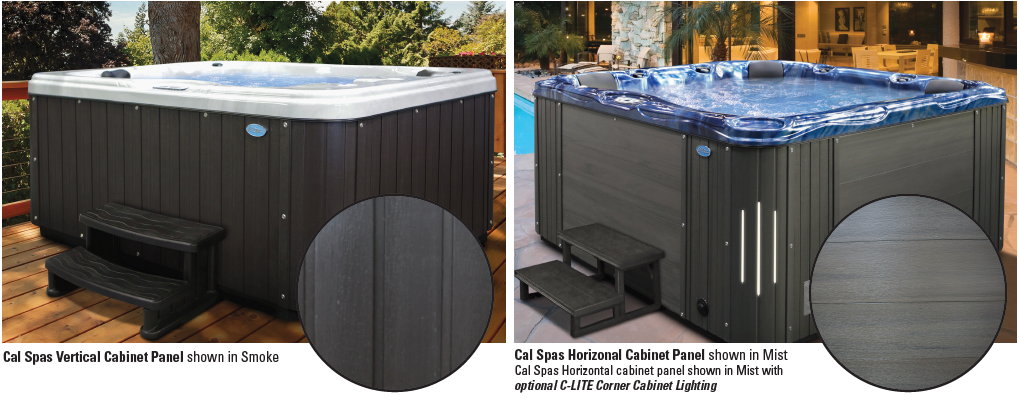
What is the Difference Between Vertical and Horizontal Cabinet Spa Panels?:
Vertical and Horizontal Cabinets*
Vertical Cabinet panels are installed top to bottom around the spa, including the
corners. Horizontal Cabinets include horizontal panels installed on the front cabinet
door, and side panels. Horizontal Cabinets have vertical rounded corners giving
a variant texture and a better overall appearance.
Textured Black Corners can be installed on any Cal Spas hot tub model. C-LITE
Corner Cabinet Lighting is an option on select models.
*Vertical and Horizontal Cabinet options are only available on select models.
HOW TO MEASURE YOUR SPA’S TRIM?:
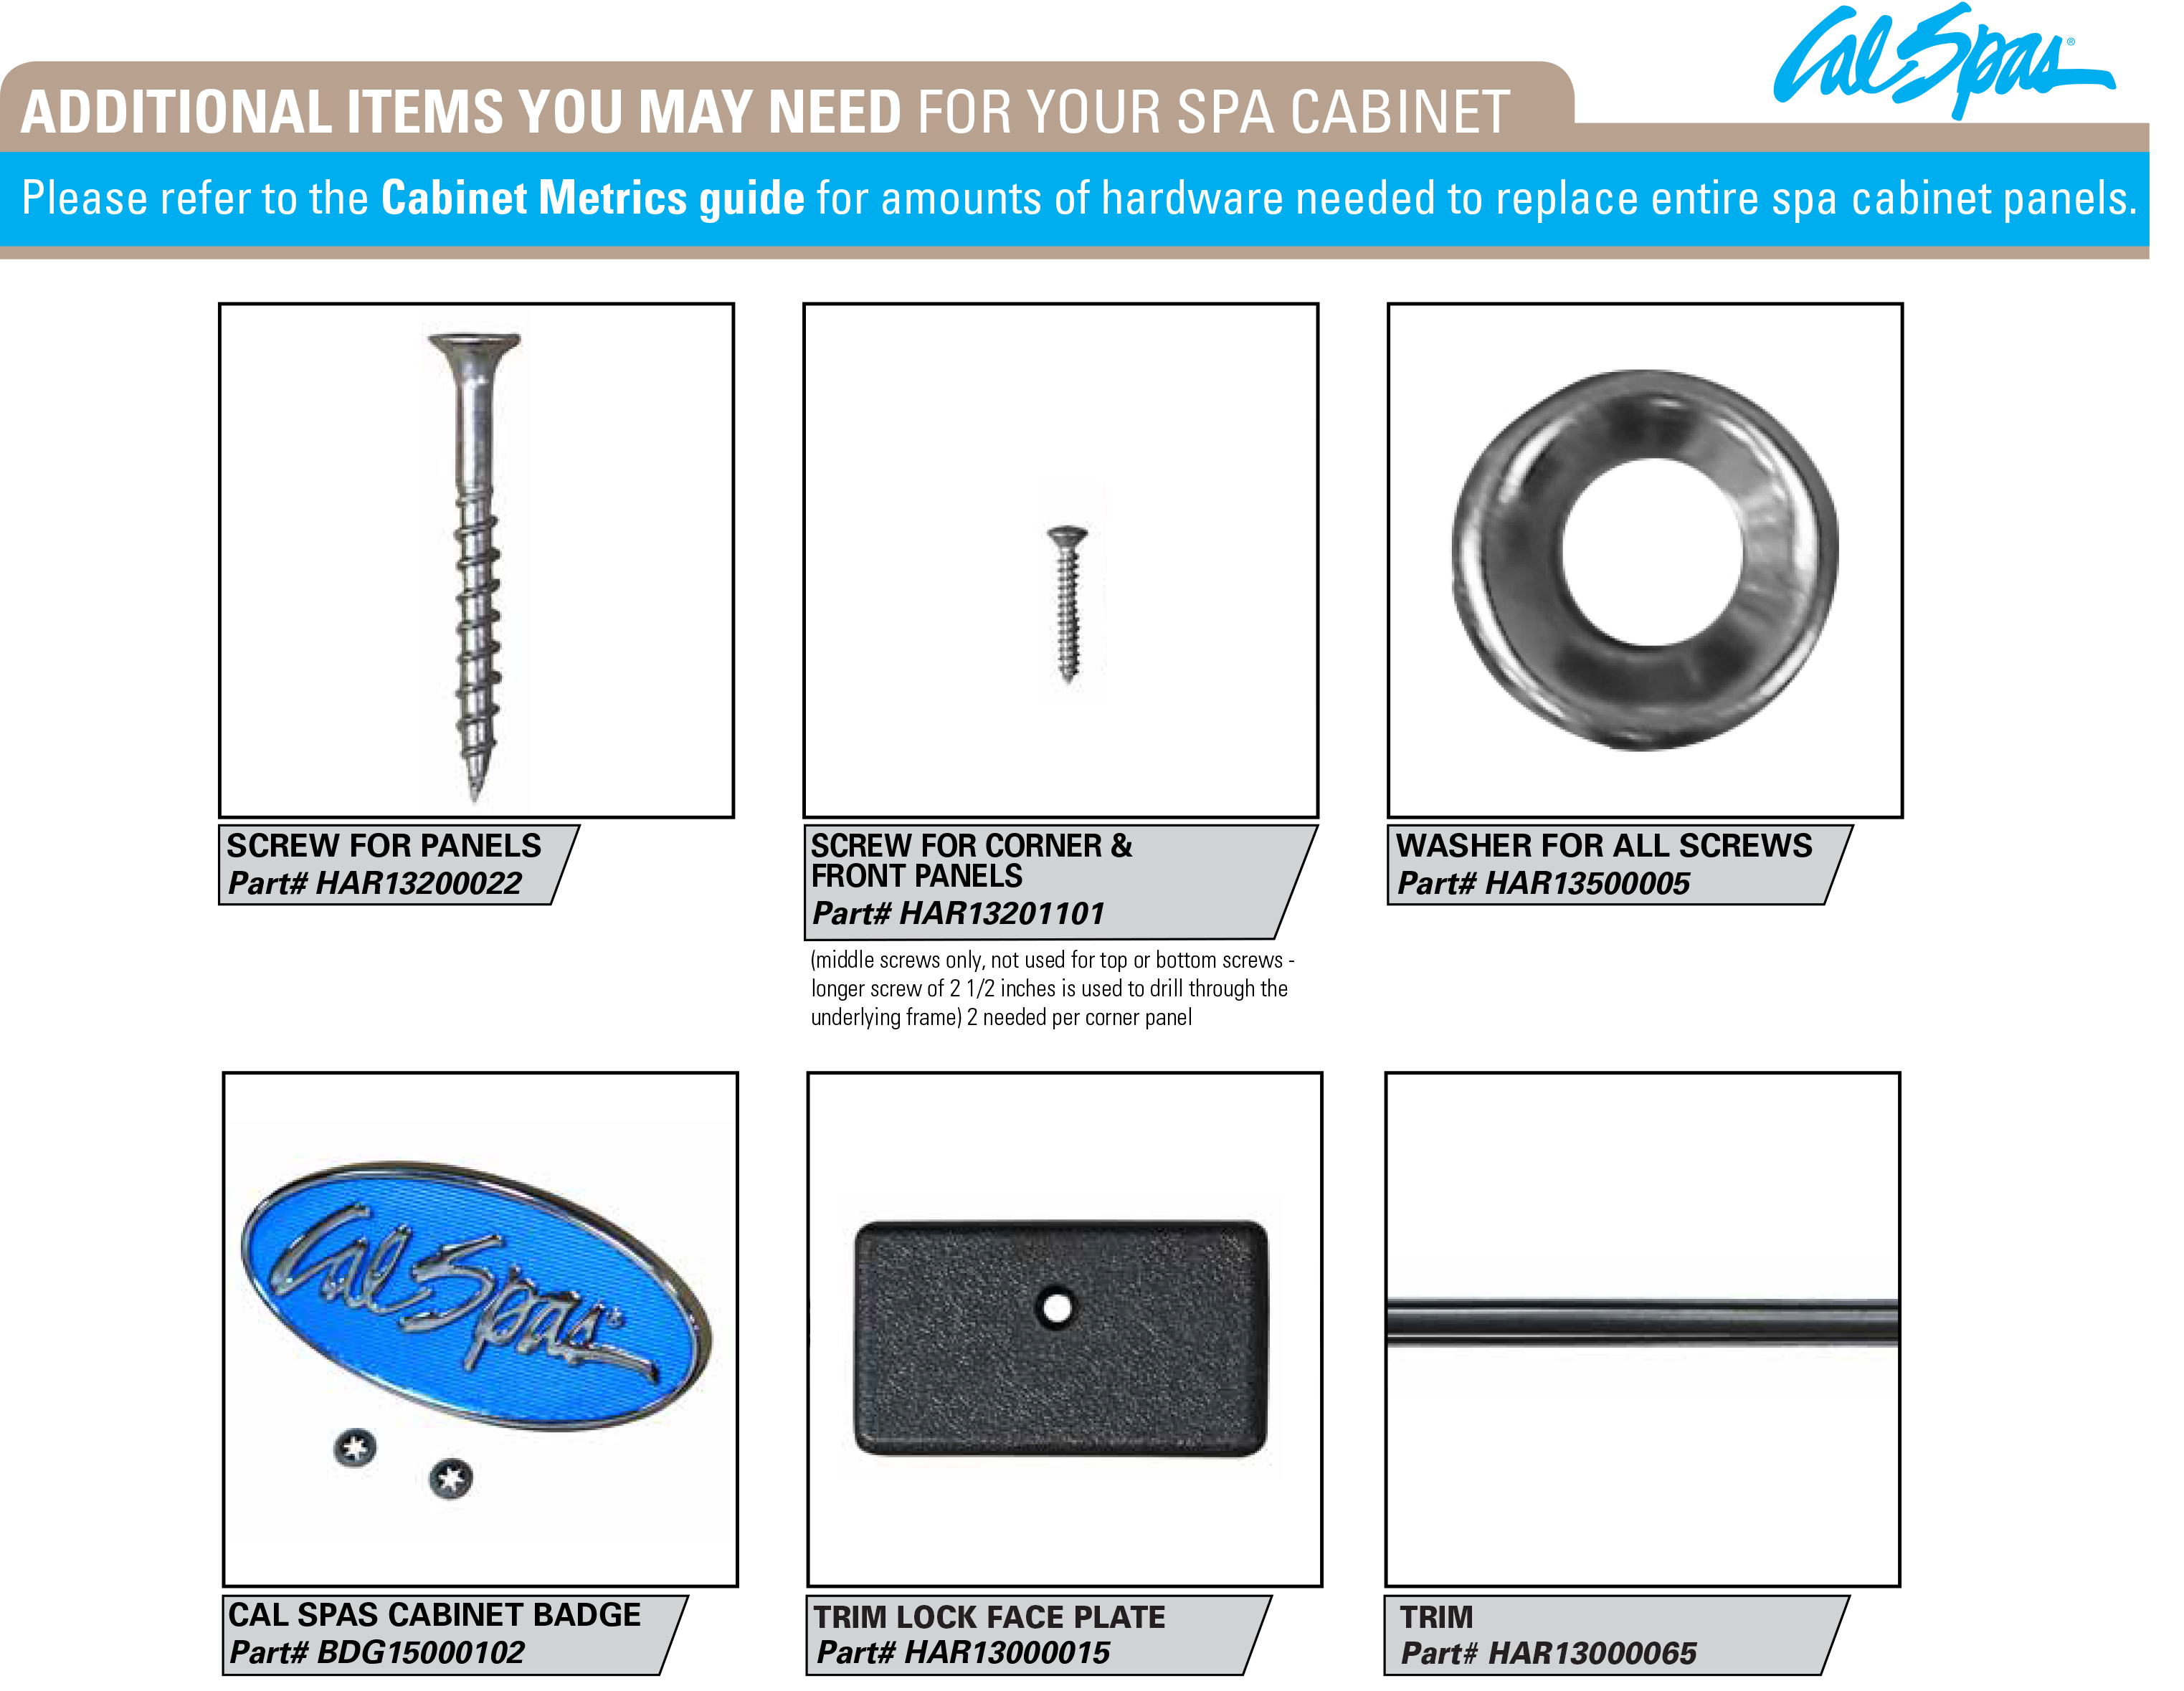
ADDITIONAL ITEMS YOU MAY NEED FOR YOUR SPA CABINET:
Please refer to the Cabinet Metrics guide for amounts of hardware needed to replace
entire spa cabinet panels.
HOW TO INSTALL YOUR SPA CABINET PANEL:
* Note: Photos and instructions are general and may not depict your actual cabinet style
This bulletin provides instructions to customers that need to install spa cabinet
panels. All that is really needed is a screwdriver and the appropriate screws and
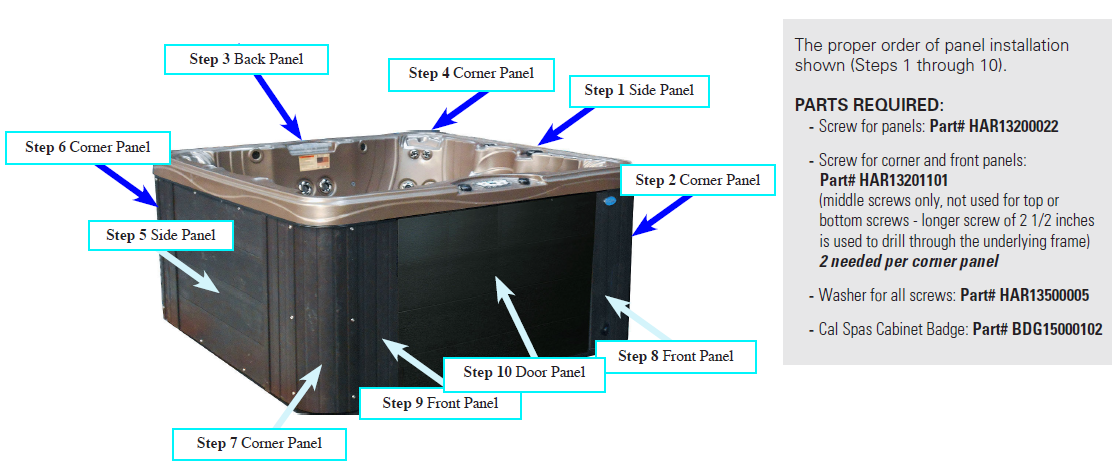
washers to install all panels. The panels must be installed in the order of steps
shown below.
Note that the Side Panels (Step 1 and Step 5) and the Back Panel (Step 3) all have
the same installation process because they are the same part and must be installed
before the Corner Panels (Steps 2, 4, 6, and 7).
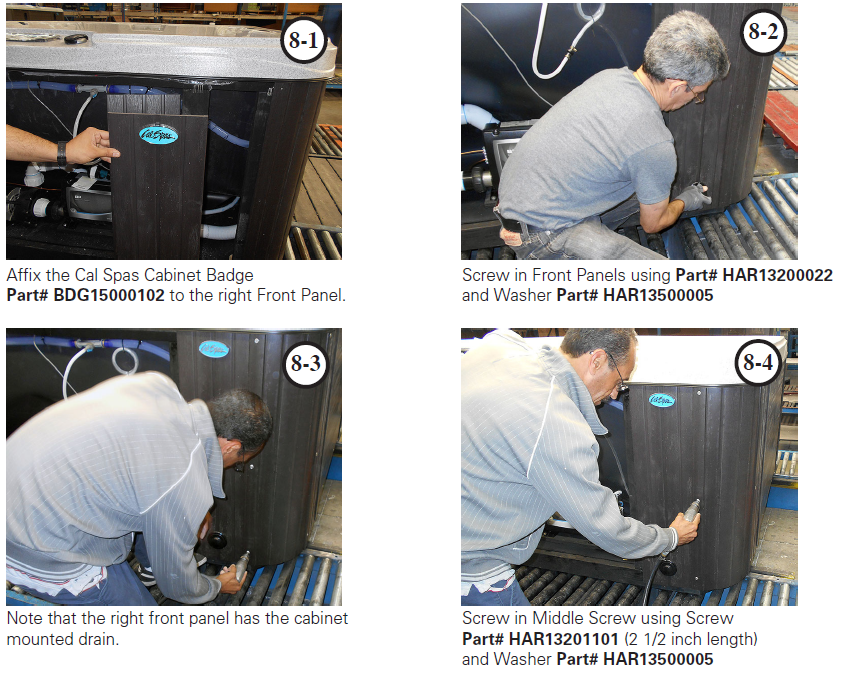
The Front Panels (Step 8 and Step 9) and finally the Door Panel (Step 10) are installed
at the end of the process.
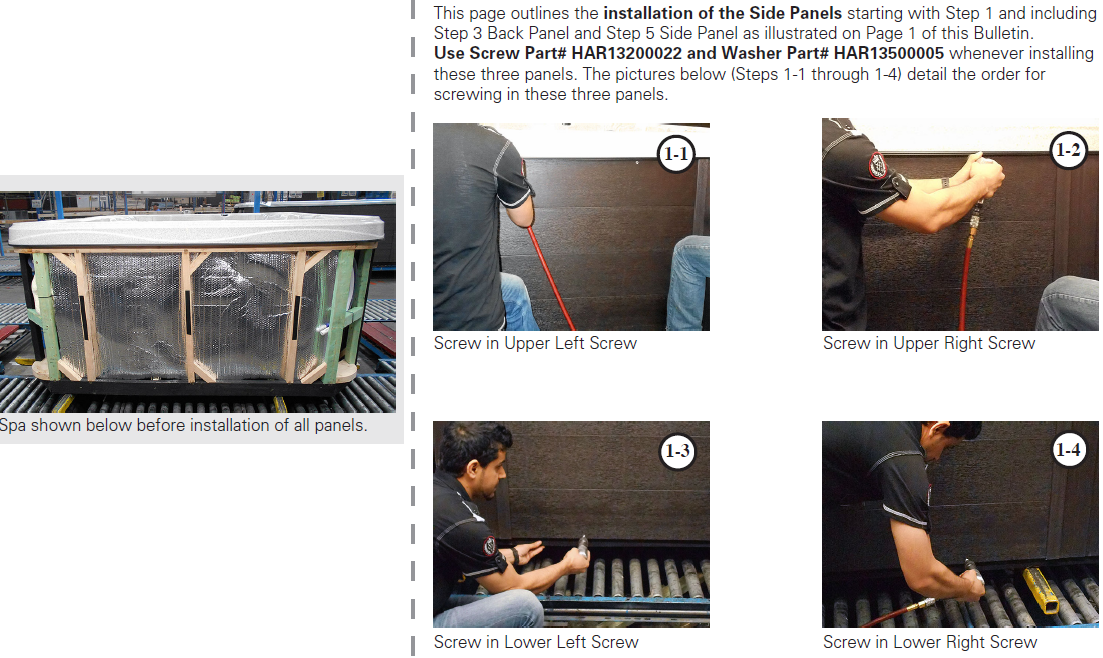
This section outlines the installation of the Corner Panels Steps 2, 4, 6, and
7 starting with Step 2 as illustrated on section 1 of this bulletin. Then proceed
to Steps 4, 6, and 7 to complete installing the Corner Panels.

This section outlines the installation of the Front Panels starting with Step 8
as illustrated on section 1.
This section outlines the installation of the Door Panel (Step 10) as illustrated
on section 1. Align the door panel first as shown in pictures 10-1 and 10-2. Then
screw in the four Door Panel screws using Part# HAR13200022 and Washer Part#
HAR13500005

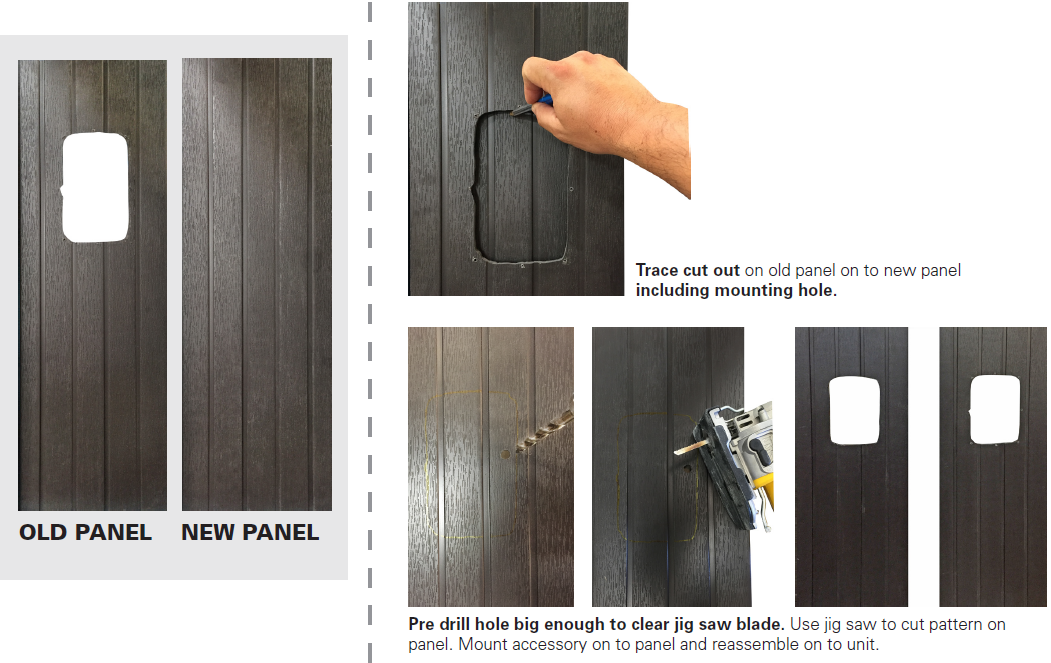
HOW TO MAKE CUTOUTS FOR SPECIAL FEATURES:
Cut outs for hardware and accessories such as drain valves, stereos, and bromine
generators must be done by a third party to ensure accuracy and a right fit on replacement
cabinet panels. Please see attached guide to create cut outs for accessories on
replacement cabinet panels.
WALL DRAIN CUT OUT INSTRUCTIONS

MISCELLANEOUS CUT OUT INSTRUCTIONS
THIS CONCEPT AND TOOLS CAN BE USED FOR THE FOLLOWING: i-POD, STEREO, BROMINE GEN
CUT OUT.
